
Instructions for Installing Mosaic Tiles (20 mm × 20 mm, mesh-mounted type)
Mosaic Tile Installation Guide
Check and Prepare the Materials


Before starting, check the mosaic tile boxes to make sure you have enough materials. Each box is individually labeled with the batch production date, color, order number, and other details for reference in case additional materials are needed.


This is an essential step to create a completely white, flat, and uniform surface for tiling (a different-colored background may affect the color of the finished result). If using cement plaster, mix cement with water. When tiling over plasterboard, apply a suitable wall primer before bonding (contact a construction chemical supplier). Once the cement is prepared, spread it evenly with a trowel. Allow at least 5 hours for the cement to dry.
Mark the Starting Lines


Place the mesh sheets on the floor and measure the total width of three sheets laid side by side, ensuring the gap between two sheets is equal to the gap between two tiles. Use a handheld distance-measuring tool to measure along the line and accurately mark the corresponding position on the surface.
Apply Cement to the Wall


Prepare the cement by mixing it with water, then use a 3.5 mm notched trowel to spread it evenly over the prepared surface. First use the flat edge of the trowel, then the notched edge, drawing horizontal lines and “combing” the cement to create an evenly ridged surface. The tiles are now ready to be set. The cement must remain soft and wet: hold the cement-coated trowel at a 45-degree angle to the surface, spread the cement evenly, and avoid leaving excess cement at the joints. When tiling a wall, we recommend making the final “combing” strokes horizontal. When applying the cement, take extra care to ensure the best possible adhesion by “working” the cement into the surface before the final “combing.” If the tiled area is frequently exposed to water (e.g., a swimming pool or bathtub), it is best to waterproof the surface first using a special protective membrane, and to add resin to the cement.
Install the Tiles


The tiles are already arranged on the mesh sheets and should be placed DIRECTLY onto the cement. Make sure the widest mesh lines run vertically. Note: the gaps between the sheets must be equal to the gaps between two tiles so that no gaps remain when the installation is complete. Structurally, mosaic tiles do not require expansion joints. Any joints in the surface should be taken into account and sealed with a suitable flexible product.
Ensure Good Adhesion


During installation, before the cement dries, use a rubber float to press the sheets firmly into place and ensure they are evenly set in the cement.
Adjust the Gaps

During installation, before the cement dries, you can still adjust the gaps between the sheets to keep them uniform. To do this, use a sheet cutter and a trowel to gently increase or decrease the spacing between sheets. This is one of the most delicate steps in the installation process and is essential for achieving a good result. Allow to dry for 24 hours.
Grouting


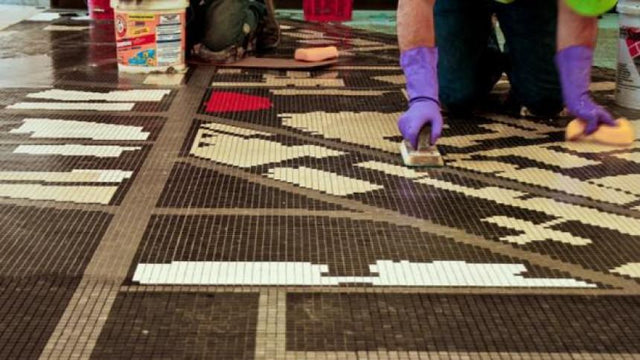
Before grouting, wipe any excess cement from the sheet surfaces. Prepare the grout by pouring all the hardener (“Part B” – 1 kg) into the paste (“Part A” – 2 kg). Make sure the container is completely empty. Slowly mix both components using a mixer at low speed (600 rpm) until fully combined, then use immediately. When working on walls, always start grouting from the bottom up to prevent the water used for cleaning (see section 8) from running into unfilled gaps. Scoop the grout with a trowel and place it on a plastic float. Begin grouting by moving the float diagonally across the tiles, working from bottom to top until all the gaps are completely filled. Be careful not to leave excess grout on the tiles. Always use protective gear.
Clean the Surface

 There is only a limited time to clean the surface (check the clock) before the grout dries completely. Begin cleaning by wetting the surface with a spray bottle. Use a white scrubbing pad to clean the tiles. Excess grout will form an emulsion, and the gaps will become smooth. Wet a sponge and use it to remove the emulsion. Repeat this process as often as necessary until the surface is completely clean and there are no traces of grout left on the tiles. The scrubbing pad and sponge can be reused many times, provided they are thoroughly rinsed with clean water. Always use clean water for these tasks.
Final Cleaning


Use a neutral soap for routine cleaning. Do not use wax, oil, hydrofluoric acid, phosphoric acid, or products containing these substances. For deep cleaning to remove calcium deposits, we recommend using a mild acid cleaner; in all other cases, use mildly alkaline products. Always follow the manufacturer's instructions when using these products, and rinse the surface immediately and thoroughly with plenty of clean water.
Mosaic Tile Maintenance mosaic
Use a neutral soap for routine cleaning. Do not use wax, oil, hydrofluoric acid, phosphoric acid, or products containing these substances. For deep cleaning to remove calcium deposits, we recommend using a mild acid cleaner; in all other cases, use mildly alkaline products. Always follow the manufacturer's instructions when using these products, and rinse the surface immediately and thoroughly with plenty of clean water.